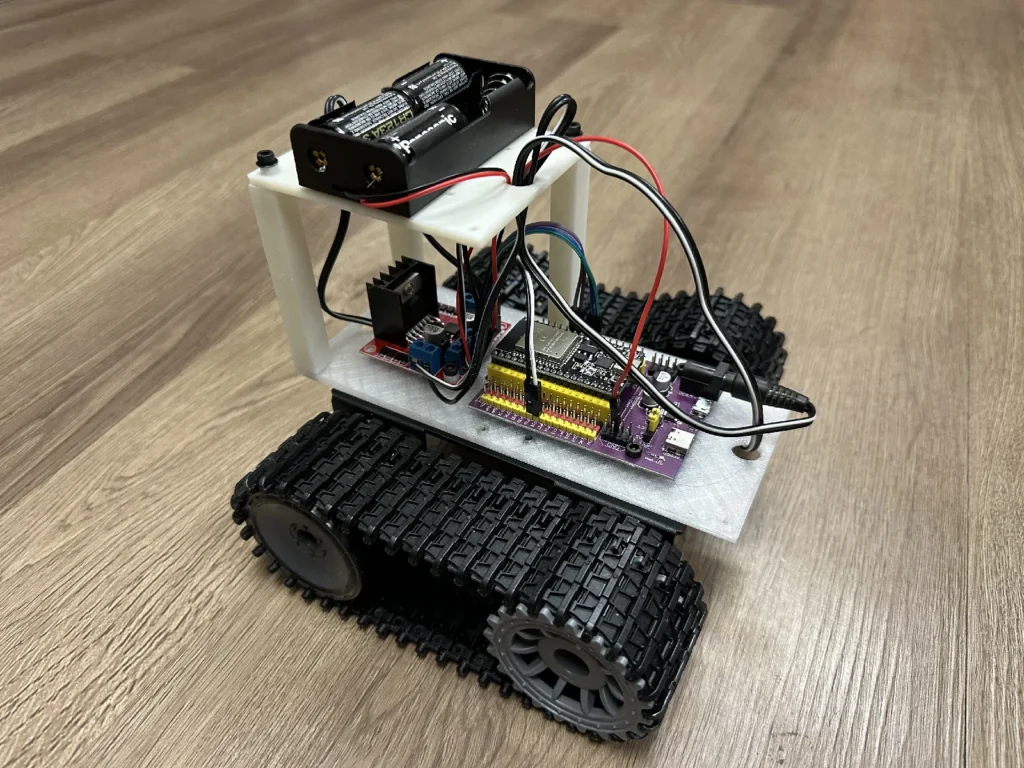
TankBot ESP32 – Web-Controlled Tracked Robot
A web-controlled tank robot built with ESP32 and L298N motor driver, featuring a responsive web interface with speed control.
The bot broadcasts its own wifi, connect with any device and it will automatically open the control page.
Assemble the electrical components to the 3d printed parts, then attach to the chassis.
Hardware Components
– Microcontroller: ESP32 DevKit (38-pin, CP2102, USB-C)
– Motor Driver: L298N H-Bridge
– Motors: 2x 33GB-520-18.7F DC motors (included with chassis)
– Chassis: TP101 Tank-style chassis (widely available)
– Power: 2x 18650 lithium batteries (7.4V nominal) (holder included with chassis)
– Fasteners: 12x M3x6 Screws
Wiring Diagram
ESP32 to L298N Connections
| ESP32 Pin | L298N Pin | Function |
|———–|———–|———-|
| P16 | IN1 | Left motor direction |
| P17 | IN2 | Left motor direction |
| P18 | IN3 | Right motor direction |
| P19 | IN4 | Right motor direction |
| P25 | ENA | Left motor speed (PWM) |
| P26 | ENB | Right motor speed (PWM) |
| GND | GND | Common ground |
L298N Setup
1. Remove the jumpers from ENA and ENB pins on the L298N
2. Connect ENA to P25 and ENB to P26 as shown above
3. Connect your battery power to the L298N power input
4. Connect motors to OUT1/OUT2 (left) and OUT3/OUT4 (right)
Power Connections
The TP101 chassis includes a dual 18650 battery holder with a power switch. Wire the power as follows:
1. Battery to L298N:
– Connect battery holder red wire (+) to L298N 12V input
– Connect battery holder black wire (-) to L298N GND
2. L298N to ESP32:
– Connect ESP32 5V pin to L298N 5V input (this powers the L298N’s logic circuitry)
– Connect L298N GND to ESP32 GND (common ground)
– The ESP32 is powered via USB during programming, or via a barrel plug connector tapped from the battery wires during operation
3. Important Notes:
– The dual 18650 setup provides 7.4V nominal (8.4V fully charged)
– The batteries power the L298N’s motor outputs via the 12V input
– The ESP32’s 5V pin powers the L298N’s logic circuitry
– Always connect common ground between all components
– During operation, power the ESP32 with a barrel plug connector from the battery wires
Software Setup
Installation
Installation instructions and software available at GitHub.
How to Use
1. Power on the robot – Connect battery and power up the ESP32
2. Connect to WiFi:
– SSID: TankBot
– Password: tankbot2025
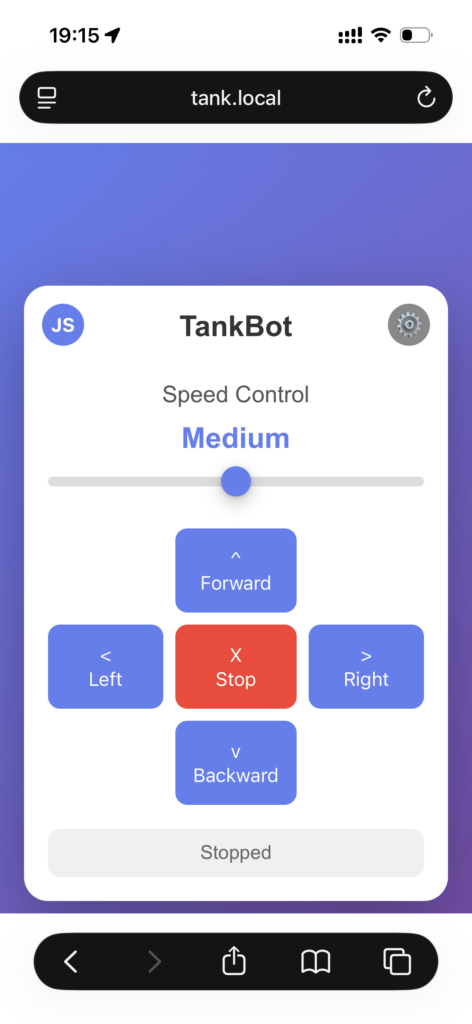
3. Open web interface:
– Open browser and go to: http://tank.local
4. Control the robot:
– Button Mode (default): Arrow buttons for Forward, Backward, Left, Right
– Press and hold buttons to move, release to stop
– Red STOP button for emergency stop
– Joystick Mode: Click “JS” (top-left) to toggle joystick control
– Drag joystick to control direction and turning simultaneously
– Forward/backward movement + left/right steering
– Release joystick to stop
– Adjust speed slider for 3 speed levels: Slow, Medium, Fast (works in both modes)
5. Calibrate steering (if robot drifts to one side):
– Click the ⚙ (gear) icon in the top-right corner to open Settings
– Drive forward and observe which direction it drifts
– Adjust the “Steering Trim” slider in the settings popup:
– If drifting LEFT: Move slider to the RIGHT
– If drifting RIGHT: Move slider to the LEFT
– Fine-tune until robot drives straight
– Close the settings popup (trim is automatically saved)
Features
– WiFi Access Point: Robot creates its own WiFi network
– Captive Portal: Auto-popup control interface when connecting
– Responsive Web UI: Works on phones, tablets, and computers
– Dual Control Modes: Toggle between button controls and joystick
– Button mode: Discrete directional controls (Forward, Backward, Left, Right)
– Joystick mode: Analog control with simultaneous forward/back and turning
– Speed Control: 3 speed levels (Slow: 160, Medium: 220, Fast: 255)
– Steering Trim: Compensate for uneven track tension (-20 to +20 adjustment)
– Trim value is saved to flash memory and persists between power cycles
– Automatically loaded on startup
– Works in both button and joystick modes
– Real-time Feedback: Status updates on web interface
– Touch Support: Works with touch screens for mobile control
– mDNS Support: Access via http://tank.local
Troubleshooting
Robot doesn’t move
– Check battery is charged and connected
– Verify all wiring connections
– Check that jumpers are removed from ENA/ENB
– Use serial monitor to see debug output
Can’t connect to WiFi
– ESP32 might still be booting (wait 10-15 seconds)
– Check password is correct: tankbot2025
– Move closer to the robot
– Restart ESP32
Motors run at full speed regardless of setting
– Ensure jumpers are removed from ENA and ENB
– Verify P25 and P26 are connected to ENA and ENB
Web page doesn’t load
– Verify you’re connected to TankBot WiFi
– Try http://192.168.4.1 directly
– Clear browser cache
– Check serial monitor for ESP32 IP address
Files
Software
Model Files